Using Virtual Motion Capture (VMC) with Beat Saber
Note: this video shows a dynamic tracker for the camera and not a static one as shown in the screenshot below
VirtualMotionCapture can be used to track your VRM avatar (If your model is not in VRM format, import it in Blender, fix it with CATS Blender plugin and export it using UniVRM in Unity). To create a mixed reality recording of a game another software needs to be used. The software you can use for compositing is either LIV or CameraPlus and the software for recording I use is OBS. LIV tutorial is first, CameraPlus follows after it.
I used LIV and VMC to record and stream Beat Saber. The reason was that I didn't want to mod the game. So in theory using VMC and LIV is an upside because you don't need to mod Beat Saber and you don't need to create an avatar that works with CustomAvatar. If your game is already modded it's better to use CameraPlus + CustomAvatar or VMC because that combination is more friendly for the CPU. If you want to use LIV + VMC in Beat Saber note that you cannot have CameraPlus and CustomAvatar installed. You can either use just LIV, VMC + CameraPlus, VMC + LIV or CustomAvatar + CameraPlus.
Using LIV as a camera
Start SteamVR, then run LIV and lastly run VMC. I suppose that you use SteamVR already if not install it and run it. Then close it. Download LIV from the Steam store and run it. Click on Install LIV SteamVR plugin. Close LIV. Run SteamVR. Make your trackers active and then run LIV.
Download VMC from booth.pm or its GitHub page and unzip it somewhere. Run the program. A control panel will open. Click on Open VRM. There you can either open a file you have on your hard drive or open a model uploaded to VRoid Hub. Click on Agree/Import and then your avatar should show up in a separate window.
The camera view is being prepared in VMC so click on camera on the control panel. Click on Free and then move your avatar to the desired location (or the camera rather). In order to move your avatar you need to press and hold the middle mouse button (you can also hold Alt + Shift, right mouse button to rotate around the center of the avatar).
When you are done with your camera view click on settings. In the Controller Number dropdown list choose Tracker (LIV Virtual Camera) and then click on Export externalcamerqa.cfg. While in the settings window check Enable VirtualCam. You will have to install it first and register the dlls using regsvr32 command. (in order to do that hit Start, and type cmd, right-click the shown cmd and run as administrator. Then type regsvr32 "[path to the dll]". Register both dlls. Then you should be able to enable the VirtualCam.
In LIV click on Camera and add an camera using the first button. Choose VMC_Camera as the device. Choose the output resolution. If you don't see the correct resolution change the color mode. Set it to static. Save it and then click on the edit button (second button from the left). There click on Calibrate. If you don't see import/export option tick Details in the upper right corner of the window. Import the file you exported in VMC and click on Save.
Now you are almost all set. What you need to do in order to make your avatar move is to calibrate it. Click on any MR Calibration on the control panel. and then make a t-pose so that the white spheres (trackers) match the places where they should be placed on your avatar's body (HMD in your head, hand controllers in your hands etc).
When you are finished with your pose press the trigger and stand still for five seconds. Your avatar should now move.
Go to Background settings again and then click on greenback background (if you haven't done that already).
If you want your avatar to move lips click on LipSync and choose your microphone from the device list.
If you will be using a Game Capture method in OBS you can just check Allow transparency. If you don't have that option you should be able to find ChromaKey filter for the capture - described below.
In LIV click on Sync and Launch if you haven't done that already. Then open OBS and add a new source - the LIV output window - to your scene (this should be now showing the VMC avatar and Beat Saber launched by LIV). You should see that the background is green. In order to get rid of it you need to add Chroma Key filter to the window capture. Right-click the Window Capture in question and click on Filters. Add Chroma Key and choose Green in the Key Color Type dropdown list.
Note that LIV outputs only video so if you want sound in your recording you will have to add an audio source as well. I wrote about OBS settings in more detail in Setting up LIV for Mixed Reality.
Note that both LIV output and the Beat Saber game resolution should be the same otherwise it won't mix correctly.
Remember that for this kind of streaming you should be using hardware encoder (for example NVENC for NVidia cards).
Now you should be all set!
Thank you for reading
S'Tsung (stsungjp @ Twitter)
Using CameraPlus as a camera
In order to use CameraPlus your Beat Saber game needs to be modded. If it isn't already you will need to download ModAssistant and install the core mods and CameraPlus which is included there as well. If you need help check the modding site's wiki.
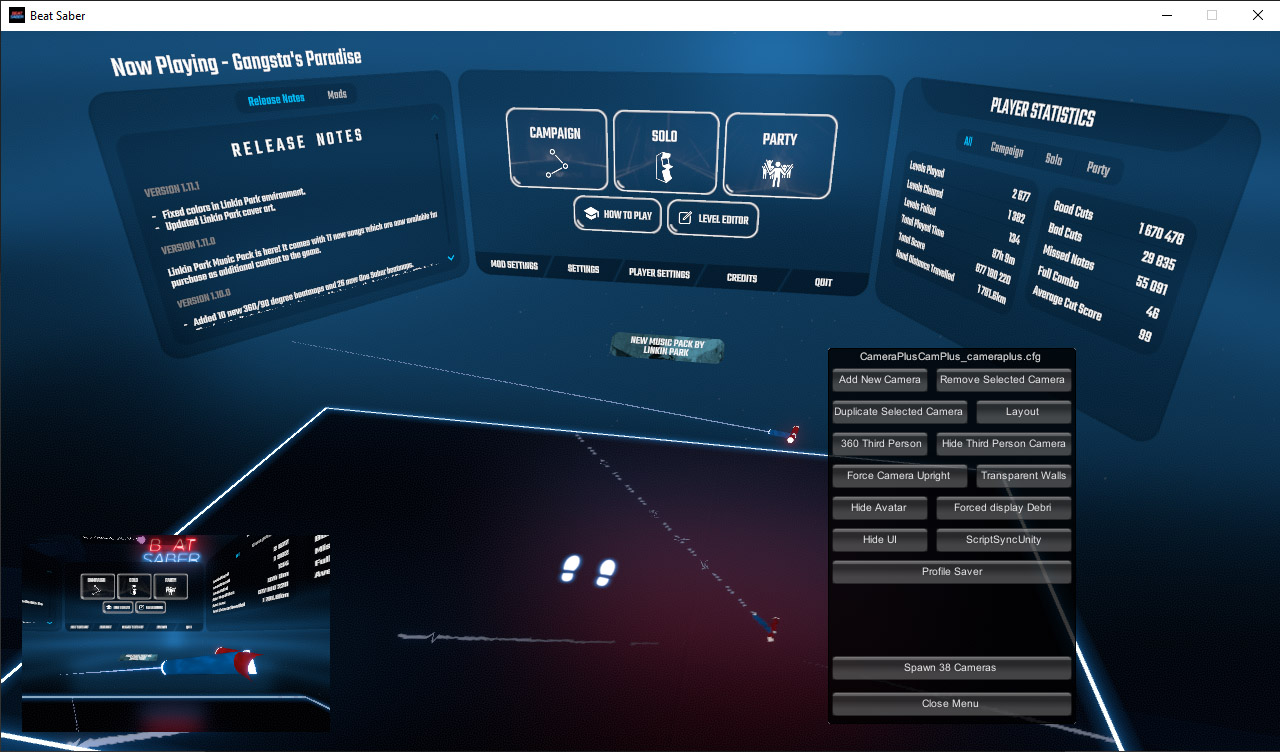
After you get it working run Beat Saber and click on the Beat Saber window. The CameraPlus menu should show up. There you can add and set your cameras. You can for example add a camera for you first person view and use the whole window for third person view that will include your avatar. Click on Layout and then change the settings so you put the camera in a place you want. After you are done with this save it to a profile.
Download VMC from booth.pm or its GitHub page and unzip it somewhere. Run the program. A control panel will open. Click on Open VRM. There you can either open a file you have on your hard drive or open a model that you previously uploaded to VRoid Hub. Click on Agree/Import and then your avatar should show up in a separate window.
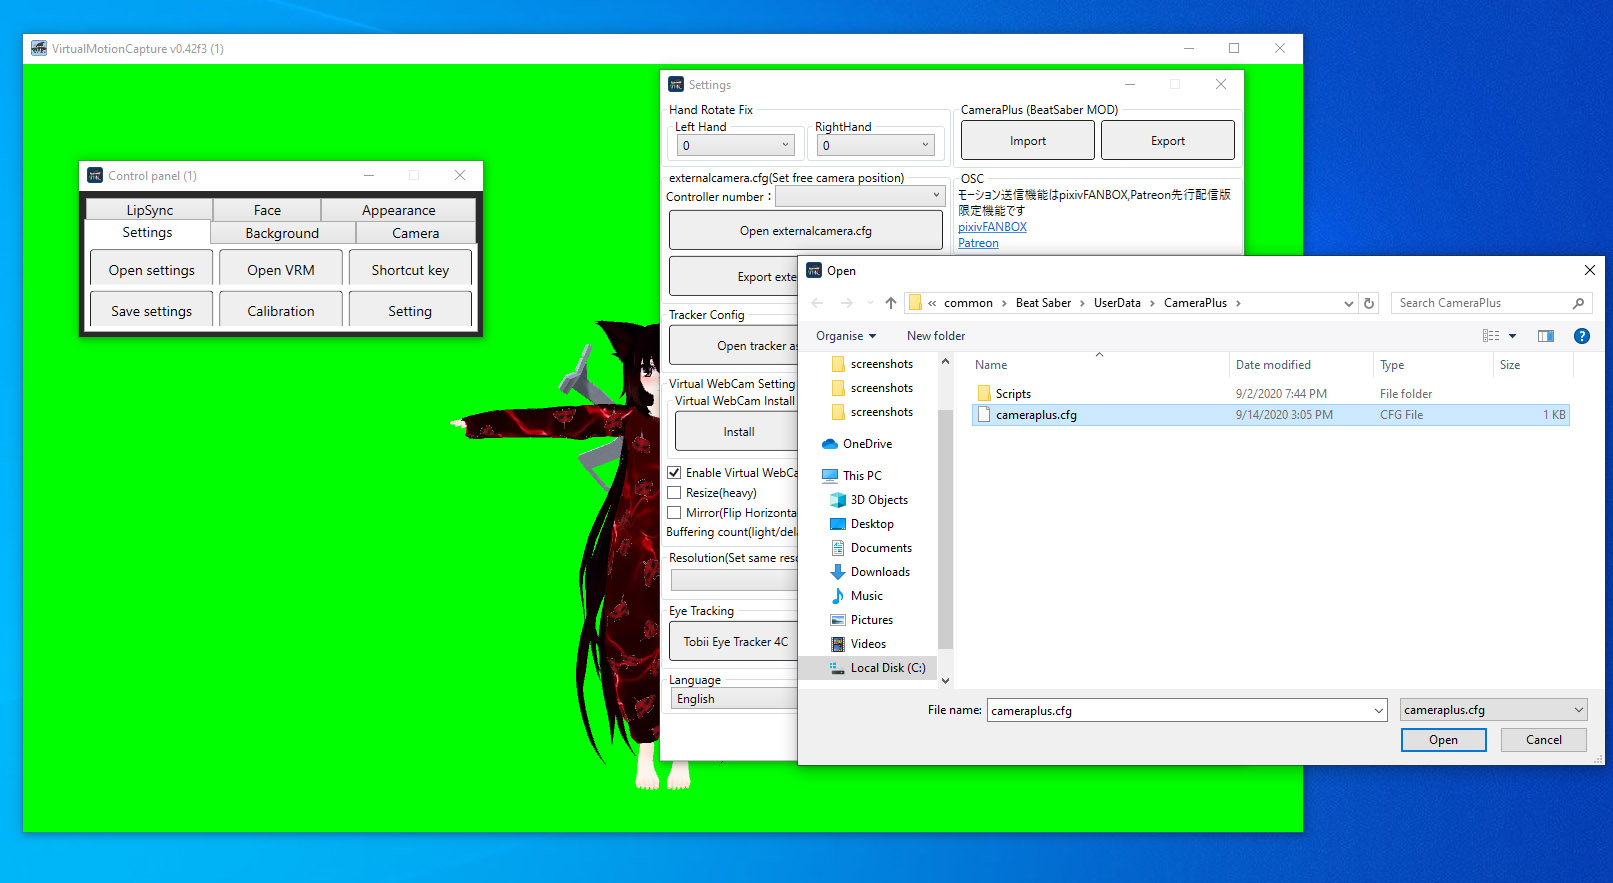
Click on settings. Under CameraPlus (Beat Saber MOD) click on Import and locate the CameraPlus config file. It can be found in your Beat Saber folder under ../UserData/CameraPlus (it needs to have the default name).
Close the settings and click on calibrate. Choose any of the MR Calibration depending on how you want the avatar legs to move. Then you will have to make a t-pose so that the white spheres (trackers) match the places where they should be placed on your avatar's body (HMD in your head, hand controllers in your hands etc). After the calibration is don your avatar should move.
In order for your avatar to show with transparent background you should set the Background to greenback background (if you haven't done that already).
If you want your avatar to move lips click on LipSync and choose your microphone from the device list.
If you will be using a Game Capture method in OBS for VMC you can just check Allow transparency. Note that Transparency should be set in VMC as well. If you don't have that option you should be able to find ChromaKey filter for the capture.
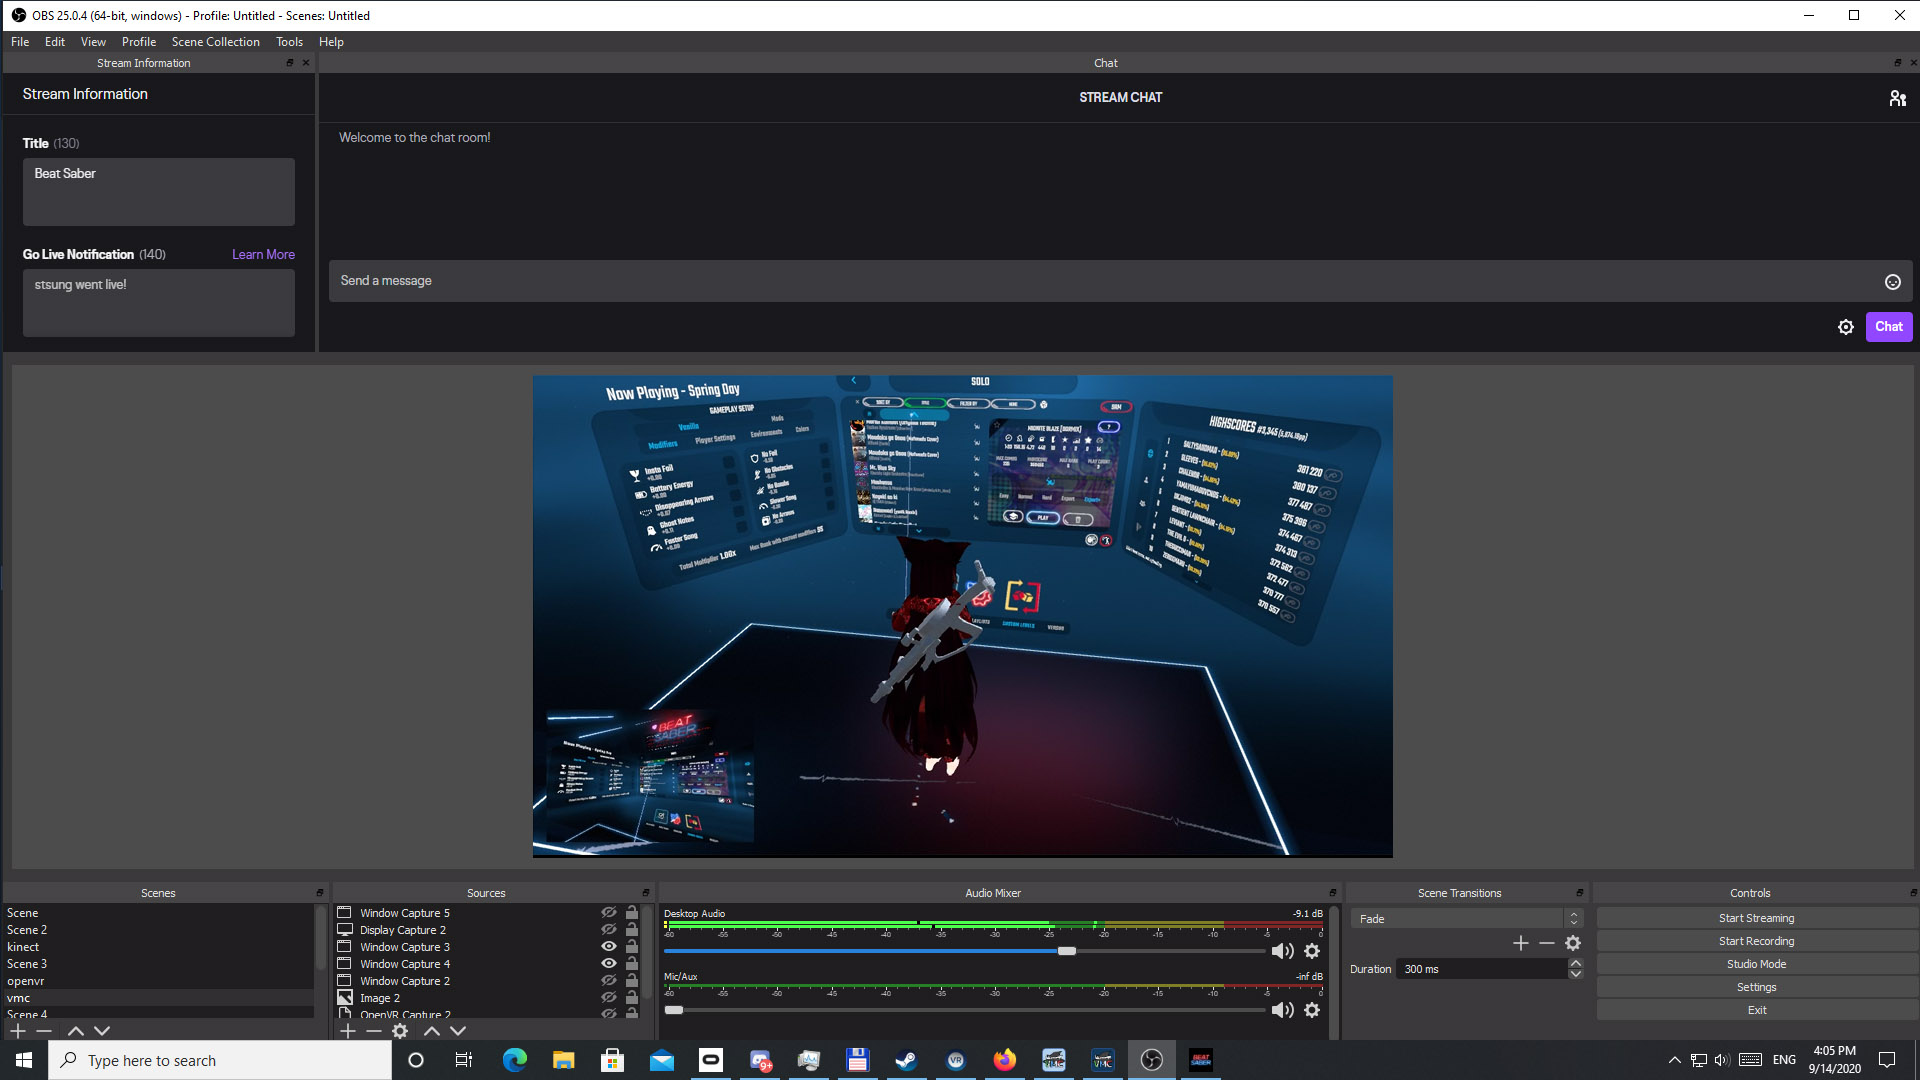
The open your streaming software and add the Virtual Motion Capture window as one source and the Beat Saber one as the second one. Note that both VMC window and the Beat Saber game resolution should be the same otherwise it won't mix correctly.
In order to get rid of the greenback background you will need to right-click the source and click on Filters. There by pressing big plus add a filter named ChromaKey and set it to the same color and hit ok. The scene should now show just the avatar without the background.
Remember that for this kind of streaming you should be using hardware encoder (for example NVENC for NVidia cards).
That's it. Happy streaming.
Thank you for reading
S'Tsung (stsungjp @ Twitter)


