Dynamic Bones
One of the things to make your avatar look more natural is using the dynamic bones script. It can be used to make the avatar's hair or skirt move when the avatar moves.
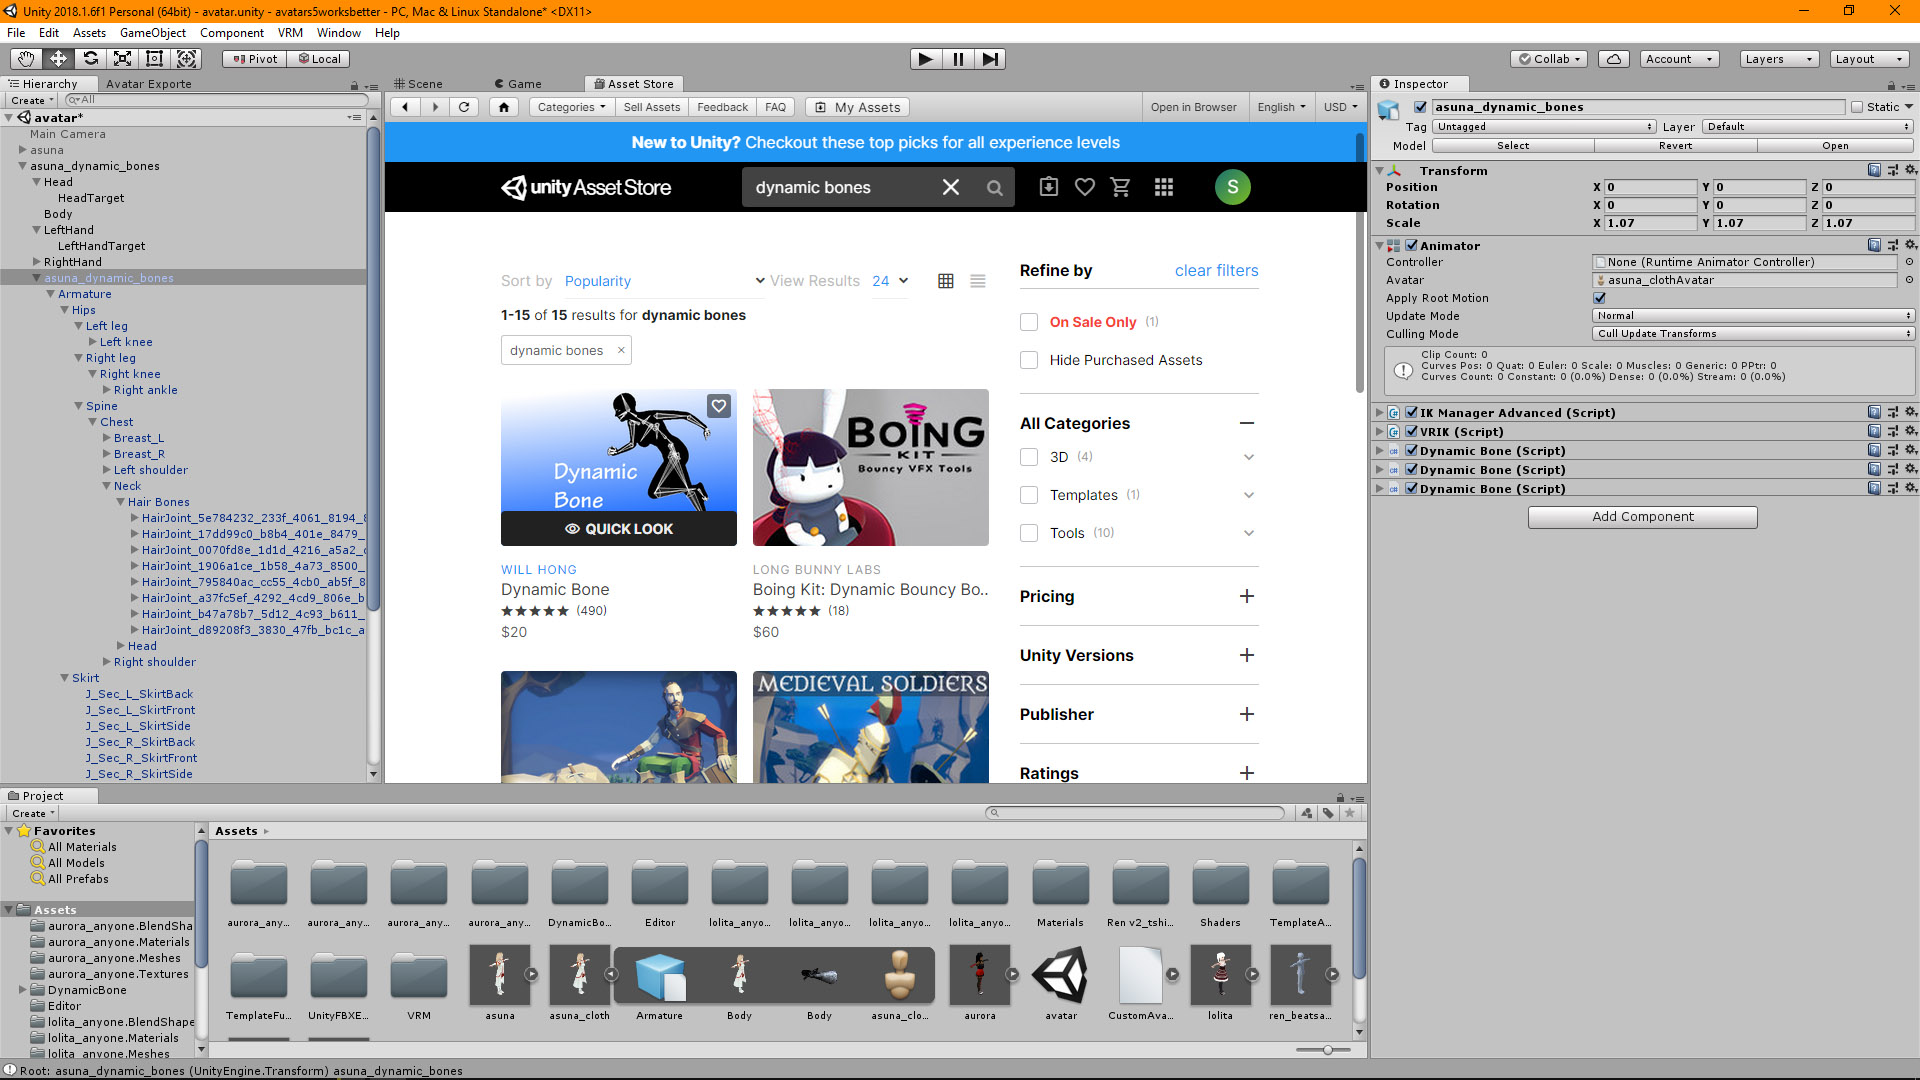
The dynamic bones package can be bought and downloaded via the Asset Store in Unity. If the window is not open you can press CTRL+9 to open it or go to Window -> Asset Store. There you just search for Dynamic Bones and get it.
If you are creating an avatar for Beat Saber or LIV note that the Dynamic Bone and Dynamic Bone Colliders script is already included in the customavatar.dll and you do not need to add it to the project. You can just add the components right away.
If the package won't be imported in your project, import it via Import Custom package.
In order to be able to use the script you should add bones to the elements that you want to move unless you already have a model with armature with these bones. Open or import the model into Blender and add the bones and then weight paint the respective parts of the model. (Note that the number of dynamic bones shouldn't be too big since it will use your CPU to make them move and it's very demanding on it. VRChat limits the number of Dynamic Bones to 32 and Colliders to 8. So keep it simple.)
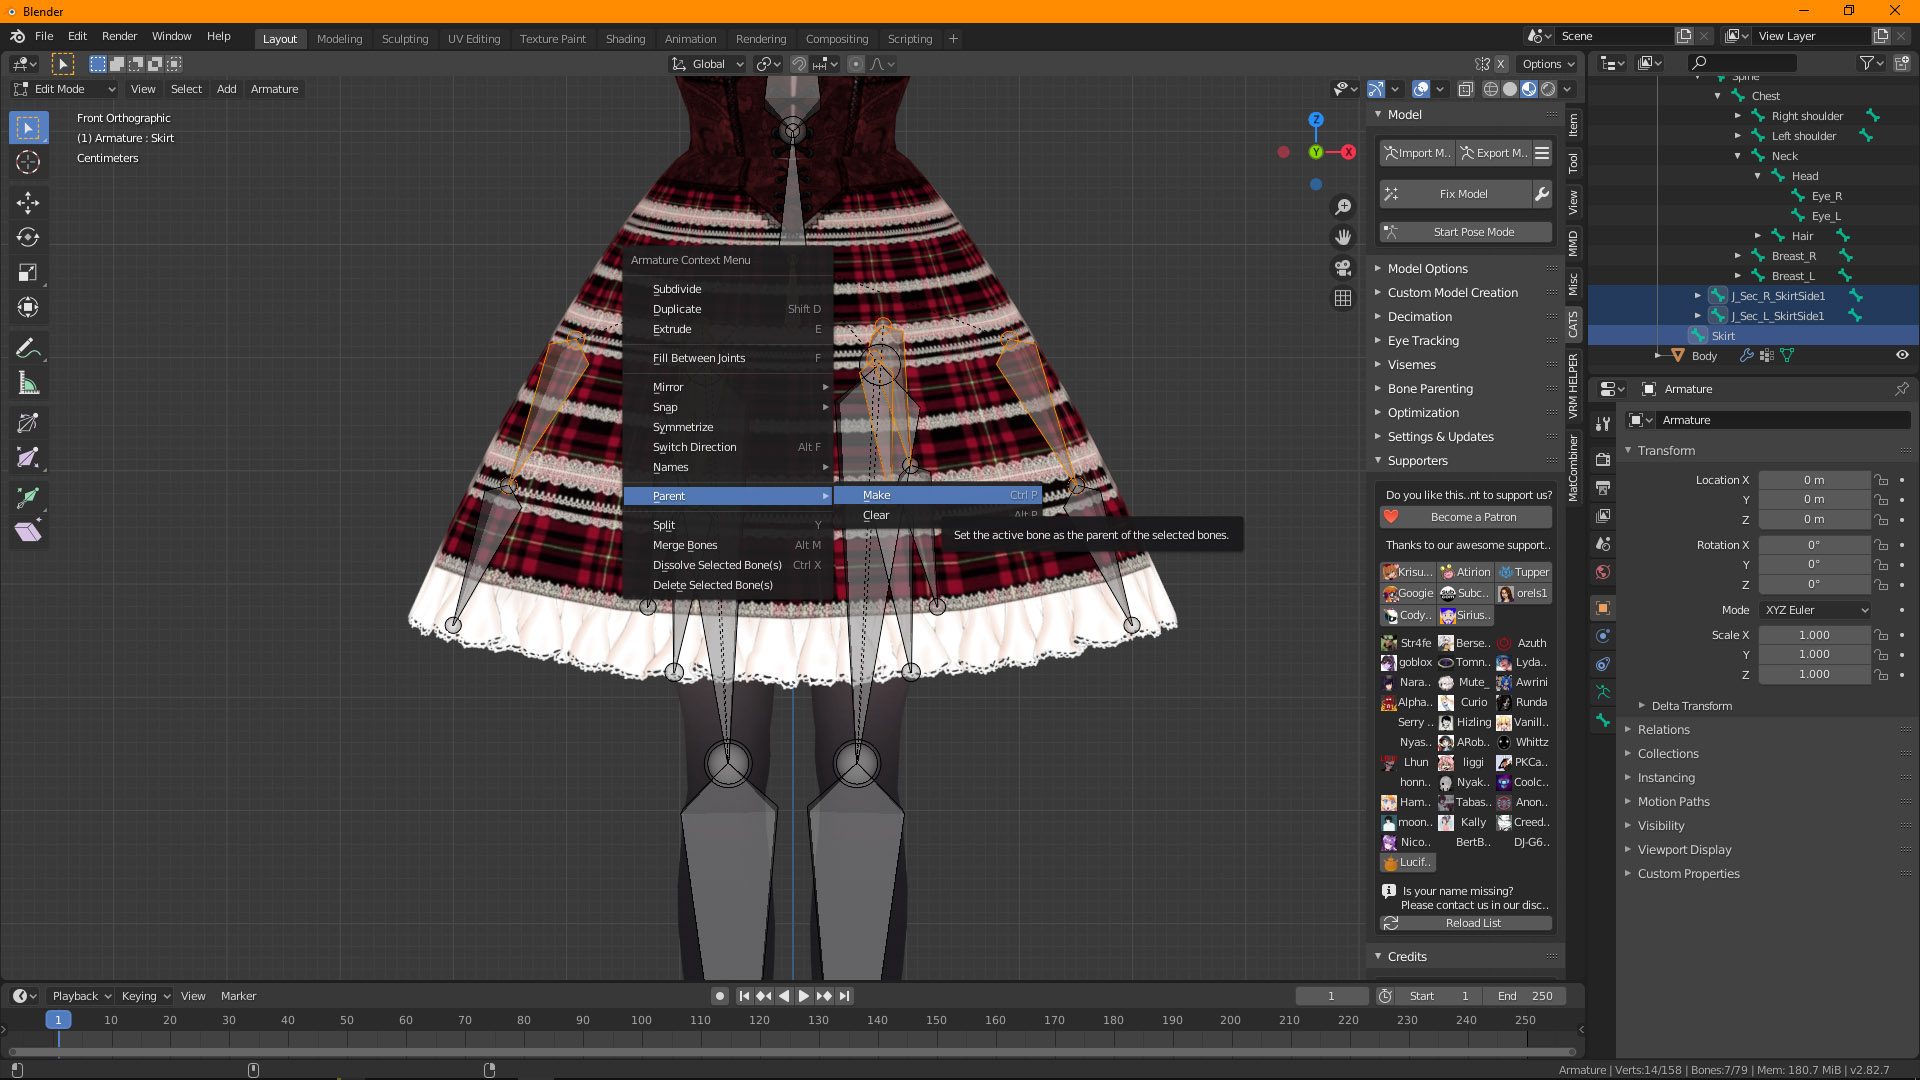
In my model's case I want hair, breast and skirt bones. A good thing to do is parent the bones so you can then apply one Dynamic Bones script to each parent bone to move all the children. This is not necessary in theory but you would have to exclude the bones in Unity and you can end up with unexpected results as well.
To parent the bones click on the armature and choose Edit mode. Select all the parent bones of the bones you want to use with the dynamic bone script. Select the root bone last and then right-click it again. Choose Parent -> Make and then choose Keep Offset. This will move all the selected bones and their children under the root bone you chose while keeping them placed where they were. Do this for all the other group of bones (skirt, breasts etc.).
When you are finished with parenting all bone groups you can export your model and import it into Unity.
I suppose you already know how to create an avatar to use with your game of choice so I won't talk about it here (see this Tutorial). You should have your avatar ready in your scene. Click on the root of it and add Dynamic Bone script for each root bone.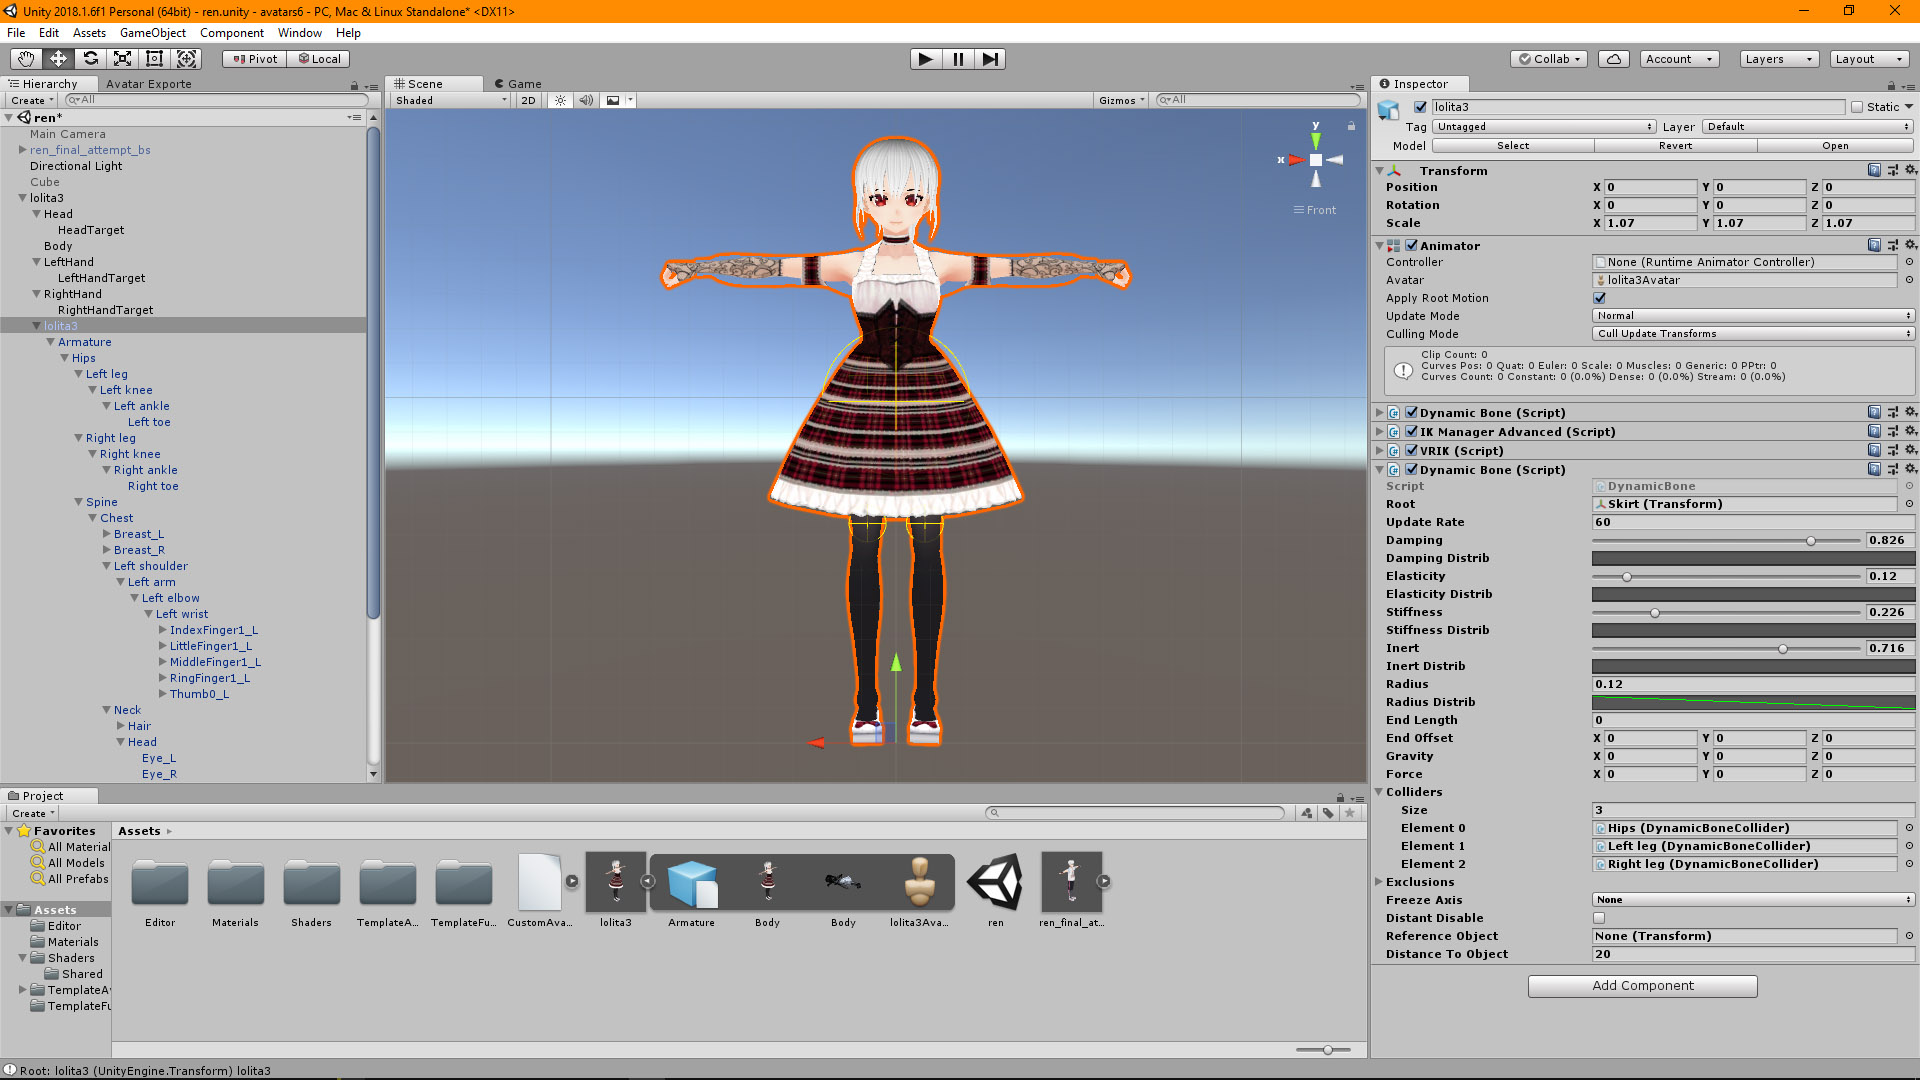
Now drag the root bone to the component's Root field. This alone will make the dynamic bones move but in order to get a good results you will have to play a bit with the values below. Update Rate should stay 60 since more will be cut down to 60 and lower rate will make the animations look trash. Damping, Elasticity, Stiffness, Inert, Radius are the values you can fiddle with. I suggest clicking on Play and try what the values actually do. Hair will have different values than clothes or ears for example. You want hair to move around quite fast and quite a lot while clothes won't move that much and ears are usually pretty stiff. For each value you can use a distribution curve which adds even more realistic feel to the avatar. Just click on the gray field next to Distrib and choose or draw the curve you want. When you are satisfied with the values you can click on the cogged wheel and choose 'Copy Component'. Then click on Play again to stop the mode and then navigate to the Dynamic Bone component. There you can click on the cogged wheel again and click on Paste Component Values.

Next thing you want to set are Dynamic Bone Colliders. Since your hair will be now flowing through your avatars body when it moves for example. Or if you want your hands to move the skirt fabric away instead of the hand just going through. To do that choose the bone in the Hierarchy window and add the Dynamic Bone Collider to it. There you can set up sphere or capsule collider. You can set height, the position of the center (do not move the bones!) and the radius which it will affect.
In order for the Dynamic Bone script to work with the colliders you will have to add them to it. Click on the root of your avatar and in the component set size under Colliders. Then drag the bones with the colliders attached to the fields that will show up (in my case Hips, Left Leg and Right Leg).
You are all set!
Thank you for reading
S'Tsung (stsungjp @ Twitter)