LIV Avatar
LIV can be used to capture a game with avatar. It supports two (three actually) formats and that is VRM and .avatar format file. The last format is glb, but it has to specifically come from Ready Player Me avatar generator.
The .avatar format file comes from CustomAvatar mod that you may know from Beat Saber. LIV uses an old version of that mod (version 4) which makes Beat Saber avatars created with that version work in LIV (note that most avatars weren't setup for full body tracking). Version 5 and 5.2 onwards are incompatible with LIV and most likely won't work at all. The LIV version supports custom shaders, dynamic bones (included in the library), audio clips, animations and particle systems. Event Manager does not seem to be supported (but I used it in the past and everything worked). The Beat Saber plugin does not support lipsync but the LIV one uses Oculus Lipsync. You may run into alpha channel issues since Beat Saber uses alpha channels for bloom effects. Beat Saber shaders if used will be replaced by standard shaders.
For information about VRM format, shaders, import and export go to VRM.dev. VRM supports eye 'animation/tracking', spring bones (something like dynamic bones), and its own viseme lipsync. Biggest downside is that it only supports Standard shaders and MToon which is, as the name suggests, a Toon shader. VSFAvatar is not thus supported.
Creating LIV Avatar
Video tutorial
- In short what needs to be done. (in more detail, below)
- Get a 3d model with a humanoid rig in t-pose at position 0,0,0 with center between the avatars feet (the point 0,0,0).
- Download Unity project -> https://drive.google.com/file/d/1YzJamlspmbri-bLa_MARe9sVZpBWaEVW/view?usp=sharing
- Download Unity 2018.4.11f1
- Unzip the project, add that folder in Unity Hub as a project.
- Open the project and import your model.
- Change the rig to Humanoid. Fix any problems there are. Apply and done.
- Extract materials/textures to a folder. Set them up with textures, your choice of shaders etc.
- Drag the model into the scene and place it to 0,0,0.
- Create an empty object at 0,0,0.
- Drag the model into the empty object you created.
- If you want you can add dynamic bones and set them up. The dynamic bones are in the customavatars.dll, don't load the assets from the asset store!
- Add Avatar Descriptor component to the empty object. Fill the information in and then export.
- Import the compiled file into LIV or put it in /Documents/LIV/Avatars.
In order to use Avatars feature you need and an avatar. You need a 3d model that is rigged with human skeleton. You can either commission it or download one from places like booth.pm or gumroad.com. To edit the avatar you can use Blender which is a free program and can be downloaded from https://www.blender.org/download/.
Note that the avatar should be in proper t-pose, rotated towards you (when you press 1) and with center at its feet at 0,0,0. The model you will be importing into Unity should be in FBX format. If it is not, use Blender to import it and then export it as an FBX.
If you don't have any Unity installed on your computer you will have to go to http://unity3d.com and create an account. Then download Unity Hub and download Unity you will need for the LIV project. You can download it from http://unity3d.com/get-unity/download/archive or via Unity Hub. The build you need to get is 2018.4.11f1. If you are not new to Unity and were using Unity for uploading VRChat content you might have 2018.4.20f1 build around. You can use that as well.

Download the LIV template project from here https://drive.google.com/file/d/1YzJamlspmbri-bLa_MARe9sVZpBWaEVW/view?usp=sharing. Unzip it somewhere. Then run Unity Hub. Click on the button ADD and find the folder from the unzipped file. If you installed Unity 2018.4.11f1 you can just click on it to open it. Otherwise pick a 2018 Unity build that you have installed and open it then.
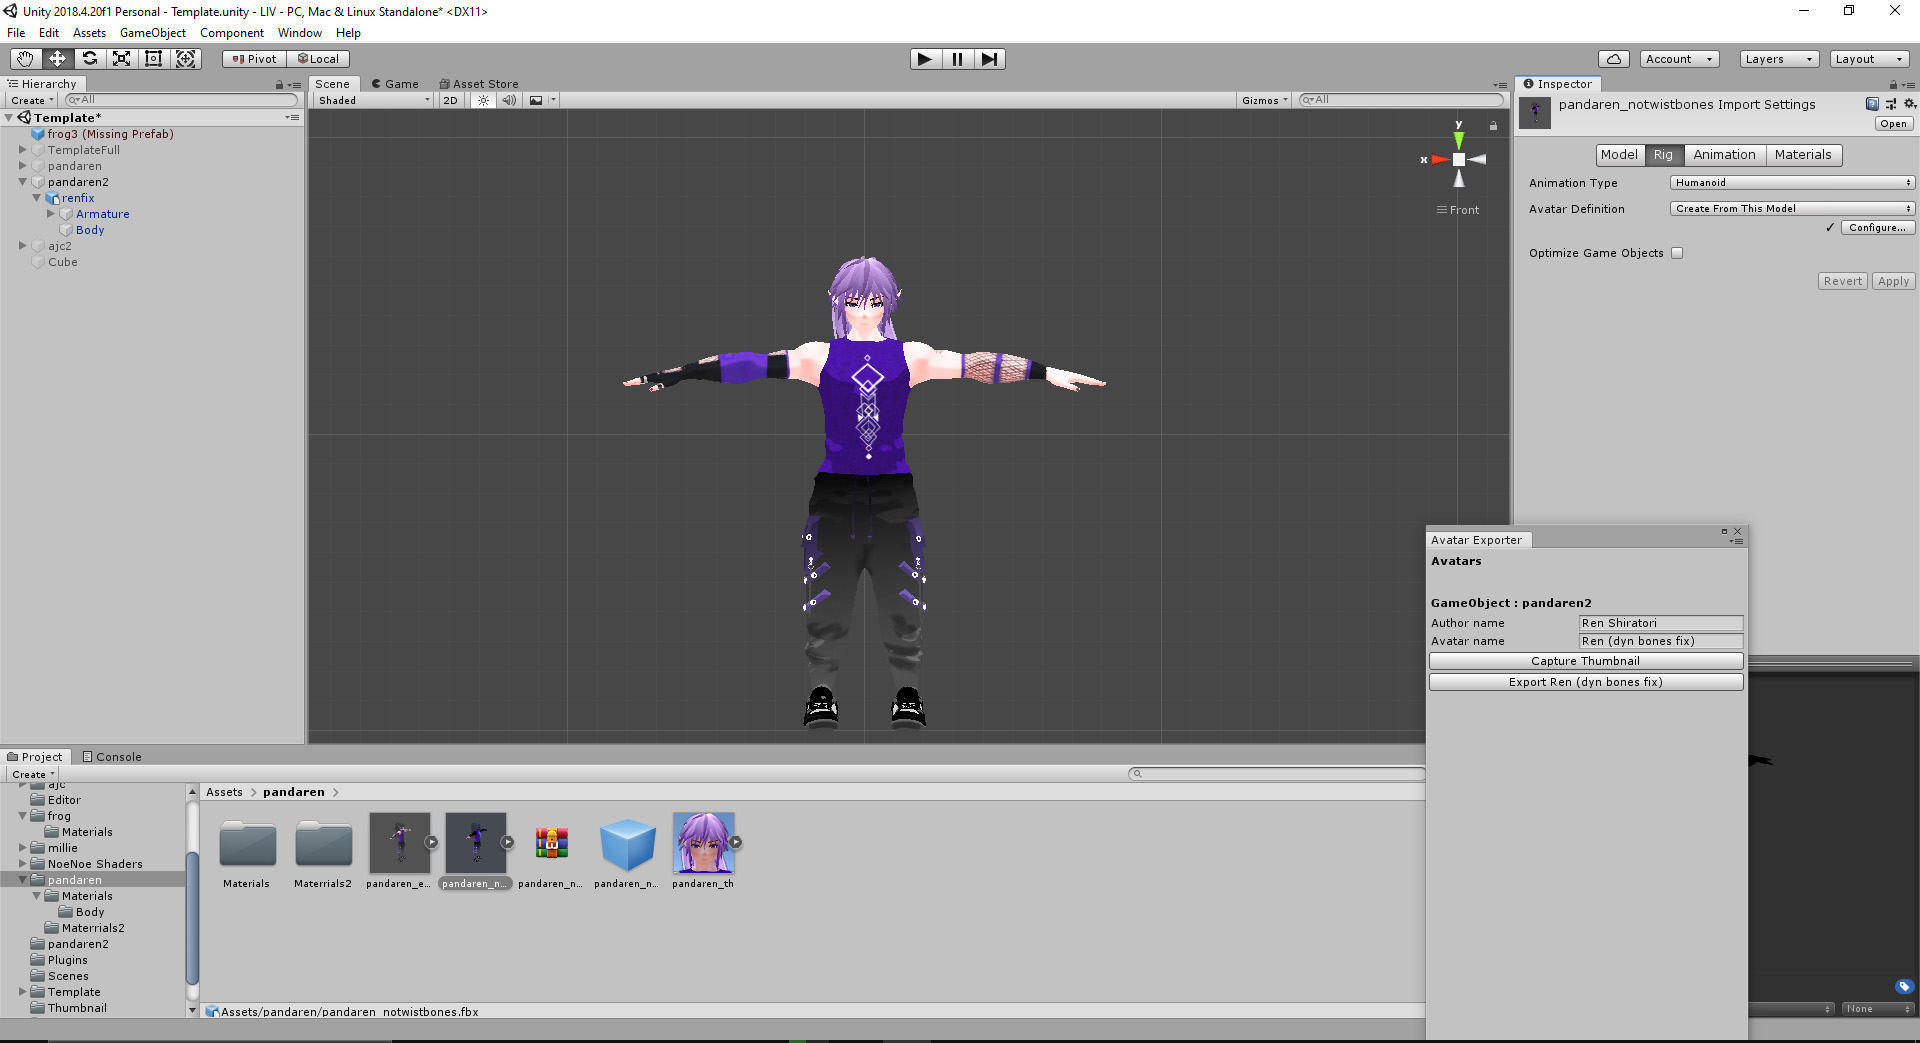
Here, in the Inspector click on Rig tab. Change the animation type to Humanoid. If Unity will show any errors fix then. Click on Configure. Check for any bones that are in red and link the correct ones or unlink the wrong ones (usually Jaw bone will contain some bone in its vicinity and it is a bone that most models don't have). If most of you see is red, you might want to reconsider renaming the bones first to something clearly understandable and then importing again).

Then click on Materials and extract them unless you already have them created. After you extract them you will be able to edit them. So either you can download them from within the folder you extracted them in or by clicking the respective body (parts) of the model. Here you can set your shaders and textures to make the avatar look like you want it.
When you are done create an empty game object and name it if you want. Place the object at 0,0,0. Then drag your model into the scene from the assets window. Place the model at 0,0,0. In the hierarchy drag that model into the empty object you just created.

Click on the object you created and in the inspector window click on Add Component. Add Avatar Descriptor script. Fill the data. You can create a thumbnail with the script or import your own if you already have one. If you import it, you will have to change it to 2d and texture type 'sprite (2d and UI) in the import settings.
At this point you can also set up Dynamic Bones. If you want to do it add the script from the CustomAvatar.dll (do not import it from asset store or elsewhere).
Note that if you want to use Oculus Lipsync, your avatar needs to have 15 specific blendshapes created. They should also have specific name or rather end of the name: v_sil, v_PP, v_FF, v_TH, v_DD, v_kk, v_CH, v_SS, v_nn, v_RR, v_aa, v_E, v_I, v_O, v_U.
Click export and choose where to save the compiled avatar. Then import it into LIV or move it to ../Documents/LIV/Avatars folder. If you don't see the Avatar Exporter window, click on Window and enable it.
Creating VRM Avatar
All information you might possibly need should be found at http://vrm.devTo create an VRM avatar you need to have a 3d model with humanoid rig in t-pose that you import into Unity and convert it with the use of uniVRM into VRM. You will most probably need Blender to edit your model and export it as FBX.
You will need to download uniVRM. You can get it from its github page https://github.com/vrm-c/UniVRM. You don't necessarily need the latest version but make sure you also get Unity that supports the release you download.
Download corresponding Unity build via Unity hub or the download archive.
Create a new project and import the downloaded UniVRM package.
Import your model. Click on rig tab in the inspector and change it to humanoid. Fix any problems and click on Done.
Drag it into the scene and place it at 0,0,0.
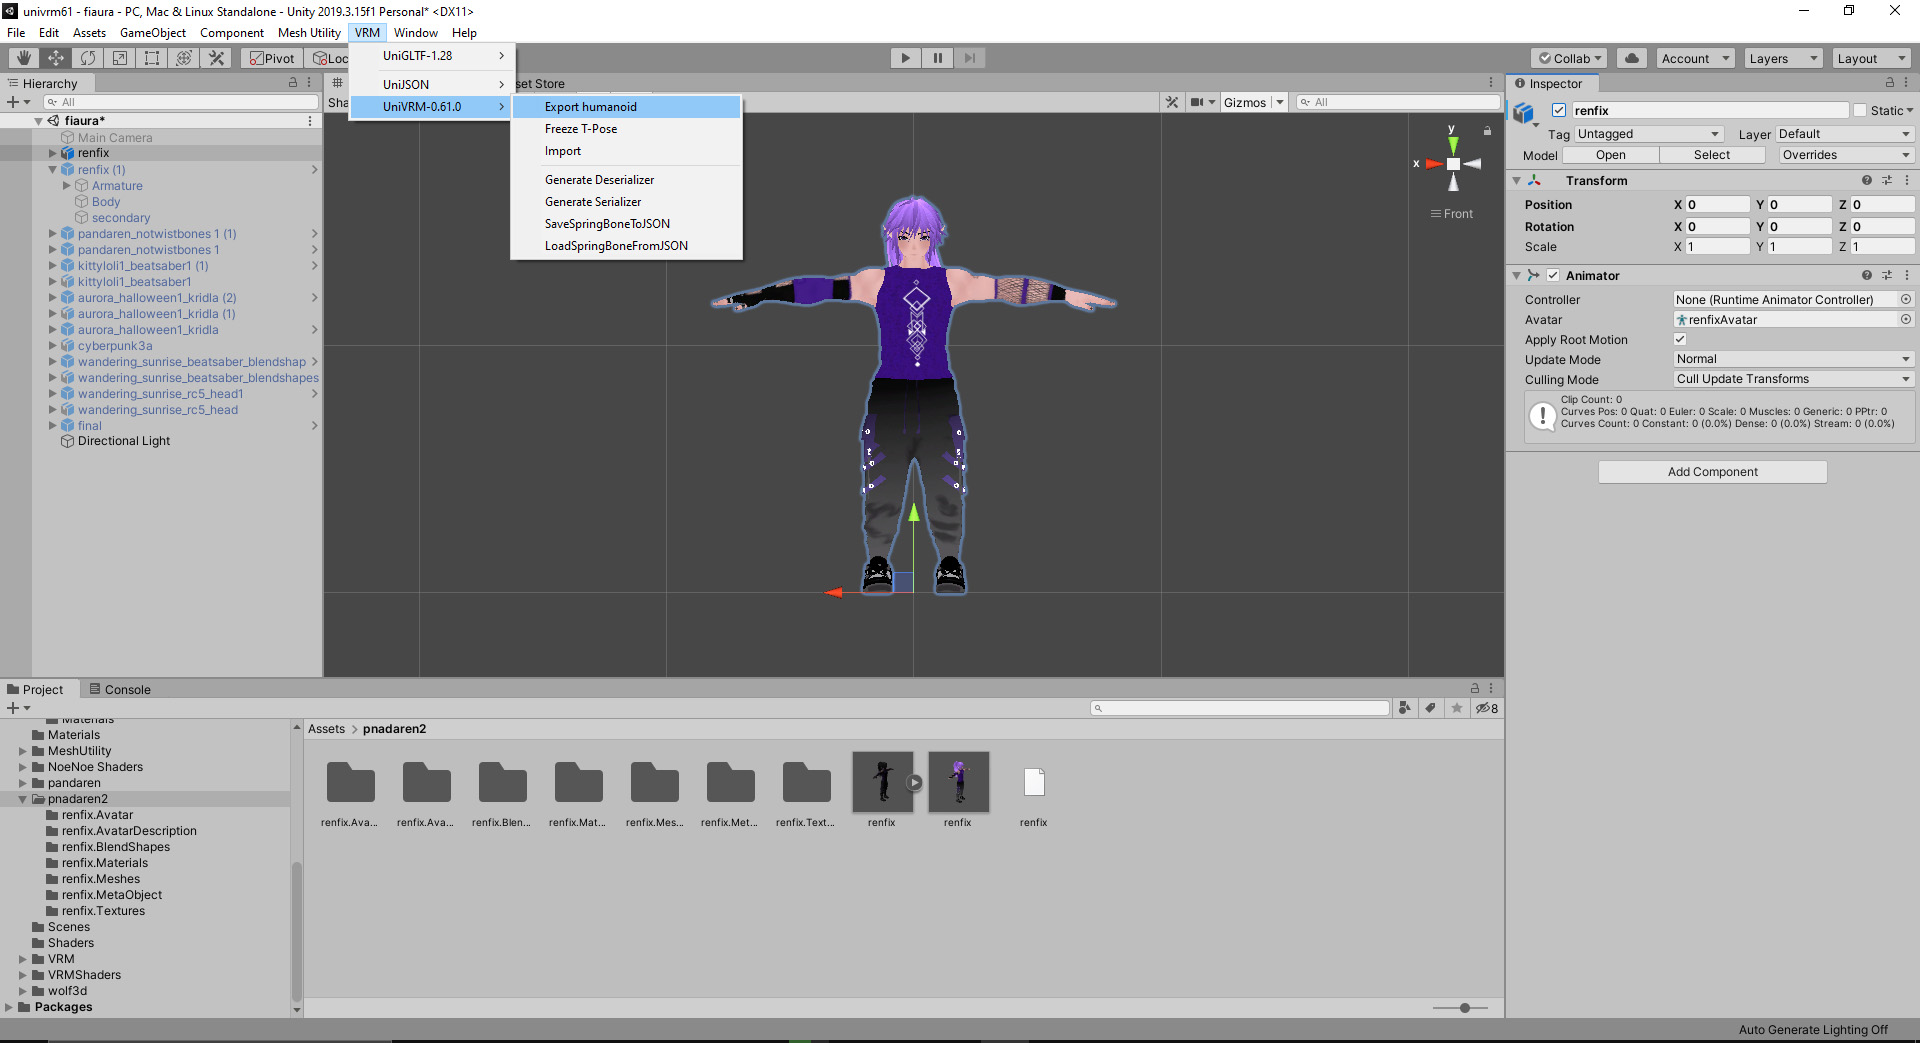
Click on the root of the model and then click on UniVRM. Click on Export Humanoid and fill what is required. It will take a while for the model to be exported into unpacked VRM. Note that the destination folder should be in your Assets folder somewhere so you can access it in Unity.
Drag the VRM it produced into the scene and place it at 0,0,0. When it is done, set up your shaders and textures. There are only two shaders available - Standard one and MToon which is a toon shader as the name suggests. You can also use UniUnlit if interested in Unlit shader (meaning there are no shadows).

You might also want to setup VRM Spring Bones. Just add the VRMSpringBone script and set it up the way you desire (add it to the bones you want to apply it to). You can also setup colliders if needed (VRMSpringBoneColliderGroup).
You can also setup eye looking if you have bones or blendshapes for it via VRMLookAtHead and VRMLookAtBoneApplyer.

If you want to setup visemes for lipsync you will have to navigate to the blendshape folder named [nameofmodel].BlendShapes. Here you can set the blendshapes seperately by clicking on each and setting it. After you click on a BlendShape, click on BlendShape List in the inspector. Add what blendshape or blendshapes should form the preset blendshape. There you choose what mesh they are on and then choose the blendshape you need (for LipSync all the vowel ones). Set the the weight to 100 (or lower if you want). If the blendshapes require change of color or materials you can also set them up in Materials the same way (if you'd want the avatars face to turn red when angry for example).
After you set everything up you can click the root of the model and go to VRM to export humanoid again. Fill in the remaining fields and choose a location outside of the Assets folder to generate the compiled VRM file.
Creating Ready Player Me Avatar
To create a Ready Player Me go to this site and follow the instructions -> https://readyplayer.me/avatar
Calibrating LIV Avatar, Camera settings
This is a quick summary of what is needed but you might want to check the official guide located at https://help.liv.tv/

In order to use the avatar with LIV you will have to create an Avatar camera (click on Camera and then the first button) in LIV and set it to avatar. You can also enable the secondary view camera. Note that if you don't want anything weird happening you should start SteamVR, power on all trackers and controllers and HMD, and then start LIV. Launch Capture.

After you create and choose the avatar camera profile you should see a LIV logo on the floor in VR. Point at it with any controller or your HMD and it will open menu where you can set camera settings and calibrate the avatar. If you imported the avatar already you will see it. Just find the thumbnail/name of it and click on it. It will load. Then click on the button 'Calibrate' and t-pose. If the calibration is not perfect, click on New Calibration. Click on manual and you can set your height and armspan. Next to you, you will also see the avatar and where the tracked objects are. You can move them around to fix your avatar posture. Apply the settings when done. Note that these settings will be remembered by LIV meaning that if you wear the trackers in a different way than last time you will have to delete the settings and recalibrate. To get rid of the settings you have to click on the cross next to 'Edit Calibration'.
In order to get the best results for full body tracking your avatar should have the same proportions as your own body. Even though LIV can change the arms' length and height the result may not be ideal since it won't change the torso or legs' length.
You can also set the Camera settings. There are different camera types so you can choose which one suits you the best. There is a dynamic view camera and static ones and each can be set via the sliders or by using your controller and actually moving the camera around. The settings should save and keep saved. You can also in enable a front view of the avatar camera in the camera settings in the desktop app (VIVR window I believe). Once enabled you can also set that camera settings while in VR. For OBS to see it you have to capture the Output window (main camera) and VIVR window (the small avatar camera).
Ren (stsungjp @ twitter), stsung#1564 on Discord